HTML 103: Adding Favicons, Videos, and Audios to a Web Page
Media Files can add engagement to a web page. We Learn how to add them using relative paths as well as add functionality to them using attributes.

Oloche Aboje - Frontend Developer & Tech Educator
I'm based in Coventry, UK, with a background in Architecture that has transitioned into Fontend web development. After completing a frontend development boot camp at the University of Birmingham, I've become proficient in JavaScript and React, and I’m passionate about making coding more approachable for everyone.
I love to share my journey through blogging, where I simplify coding for beginners with clear explanations, stories, and quizzes. My blog isn’t just a record of my learning; it's a place where I help others start their coding adventure in a friendly and engaging way.
Here, you'll find insights into my transition to tech, alongside tips and tricks that make programming less intimidating and more fun. It's about creating a welcoming space for anyone curious about coding, offering guidance and encouragement every step of the way.
Welcome to my blog, where each post aims to make learning tech enjoyable and accessible to all.
Refresher Quiz
Let us see how well we remember the concepts from our previous article:
Question 1: What special HTML tag is used to preserve formatting such as spaces and line breaks within the text, making it appear exactly as written in the HTML code?
pre tag is used to preserve the exact formatting of the text as it is written in the HTML code, including all spaces, line breaks, and indentation, which are typically not preserved when using standard HTML tags like p tags for paragraphs.Question 2: Why are comments added to HTML documents, and how do they impact the display of the webpage?
Question 3: In HTML, how can you make a hyperlink open in a new browser tab instead of the current one?
target="_blank" attribute to an anchor a tag, you instruct the browser to open the hyperlink in a new tab. This is particularly useful for external links or ensuring that users do not lose their current page position.Question 4: What function does the 'title' attribute serve when used within an anchor tag in HTML?
title attribute provides additional information about the hyperlink, typically displayed as a tooltip when the user hovers their mouse over the link. This can enhance usability and accessibility by giving users more context about the link's destination or purpose.Question 5: Explain the process of creating a hyperlink that directs to another webpage using HTML.
a tag, where the href (hypertext reference) attribute specifies the destination URL of the link. The text or content placed between the opening and closing a tags becomes clickable and directs the user to the specified URL when clicked.Question 6: What role does the 'href' attribute play in anchor tags in HTML?
href attribute in an anchor tag specifies the URL of the page the link points to. It is essential for defining the destination of the hyperlink, enabling users to navigate from one resource to another by clicking on the link.Question 7: How are absolute and relative links distinguished in HTML, and when might you use each type?
Question 8: What is the correct way to control the display size of an image in HTML?
width and height attributes within the img tag. Specifying these attributes allows developers to resize the image directly in the HTML, affecting how it is displayed on the webpage without altering the original image file.Question 9: How can developers include hidden notes or documentation within HTML code without affecting the webpage’s visual output?
<!-- to start the comment and -> to end it. This text is ignored by the browser when rendering the page, allowing for internal documentation or notes to be added without any impact on the page's layout or content seen by users.Question 10: Can you explain the differences between absolute and relative paths in HTML, providing examples as described in the article?
<a href="https://www.linkedin.com/in/ao111">Linkedin</a> uses an absolute path because it provides the entire URL needed to access the resource from anywhere on the internet. Relative paths, on the other hand, specify a link in relation to the current document's location without the domain name. They're used for linking to resources within the same website. An example from the article is the link to the projects page: <a href="./assets/projects.html">Go to Projects</a>. This relative path starts with ./ indicating that the projects.html file is located in the assets directory, which is at the same level as the current document. This method makes it easier to manage links within a website since you don't need to update the domain name if it changes or when moving the site to a different domain.Adding Favicons
A favicon or Favourite Icon is an image that appears as the icon of your website or webpage, displayed on the browser tab. Usually, a logo is used as the favicon of your webpage.
First, get an image you wish to use and add it to your images folder. We will use the passport as our favicon.
within the
headsection of ourindex.htmldocument, create a pair oflinktags just above thetitletags.Notice that this is a self-closing tag, add an
hrefattribute, and set its value to the relative path to the passport.Add a
typeattribute and set its value toimage/jpgsince the passport is an image file with a.jpgextension.Finally, add
relattribute and set its value toicon. Your code should look like this:
<link href="./assets/images/passport.jpg" type="image/jpg" rel="icon">

notice the favicon next to the web page’s title.
Working with Video Files
You can add videos directly to your web page as follows:
Create a
videosfolder inside yourassetsfolder in vs codeFind a video, representing a project you have done. You can get a free one from canva.com.
In your
projects.htmlfile, create a newprojectssection right under yourproject 1and call itproject 2, using ah2tag.Next, use a
videotag the same way you used theimgtag inproject 1above. add asrcattribute and set it to the relative path to the the video file.Change the width as desired by adding a width attribute and set the width to 400px.
Add a
controlsattribute for the video to be able to be played.Add an
autoplayattribute for the video to play automaticallyAdd a
mutedattribute for the video to be muted by default to avoid distractions to users.Add a
loopattribute for the video to loop back to beginning when finished.Give it a short description using a paragraph tag.
You should know that you can turn any image or video file into a hyperlink by wrapping it in anchor tags and setting the
hrefattribute to a url of choice. we will set our url to the source file in canva.Finally, have the link open in a new tab by setting the
targetattribute to_blank
<h2>Project 2</h2>
<a href="<https://www.canva.com/design/DAGA8YG9y_w/7Ks8QYsEn-z3X8OTXu0LWA/edit>"><video src="../assets/videos/project 2.mp4" width="400px" controls autoplay muted loop target="_blank"></video></a>
<p>A very short video demo</p>
Here is the code as well as the live preview

Activity h05:
Adding Audio Files
We are going to add a few audio files to our profile:
In our
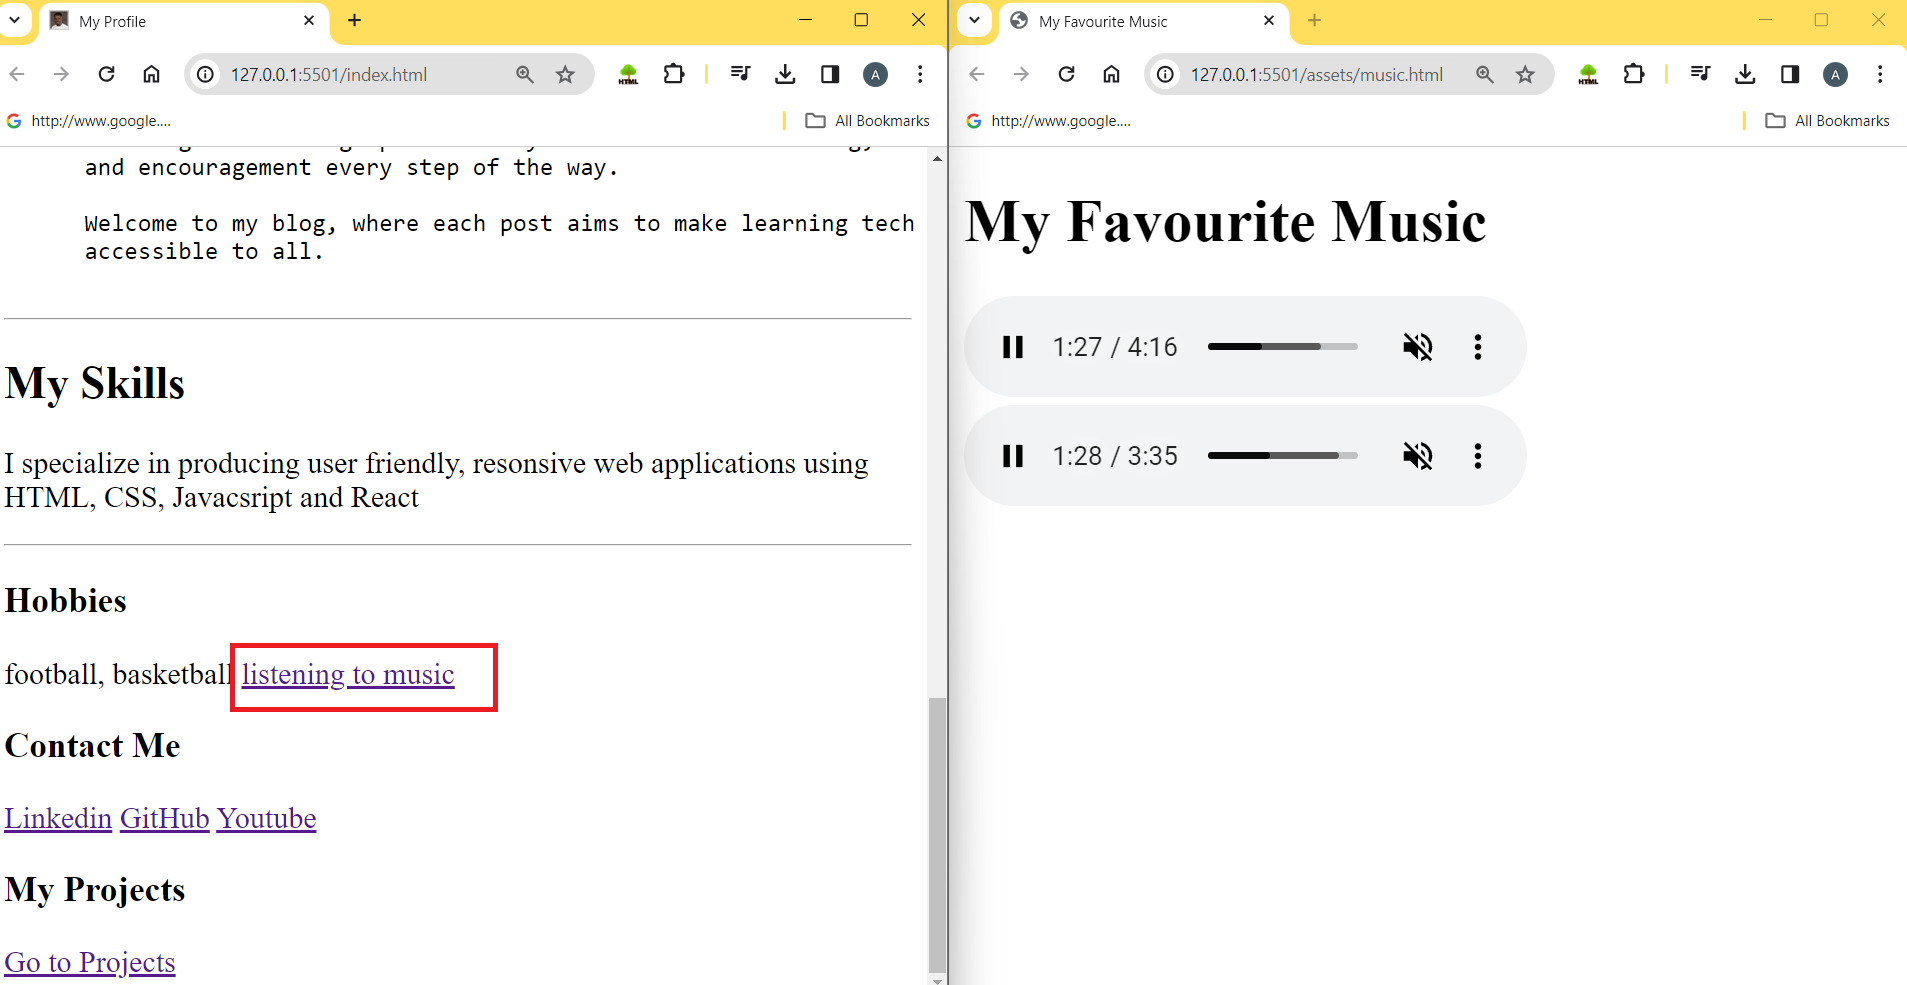
index.htmlfile, add a new hobby to the hobbies section: “listening to music”Wrap this new hobby inside anchor tags and set the relative path to
./assets/music.html. Remember to add atargetattribute and set it to_blankto open in a new tab.to create this
music.htmlfile, inside your assets folder, create amusic.htmlfile.open this
music.htmlfile and create a boilerplate code.Title it
My Favourite MusicUsing an
h2tag, add a heading titledMy Favourite MusicI am pretty sure you have some audio files of music you listen to regularly, grab those files, create a folder called
musicinside your assets folder, and paste those songs in there.Right under the
h2tag. create anaudiotag and specify a source attribute to a relative path to the first song, then do the same for all the other songs, in separate audio tags.next create attributes for
controls,muted,autoplayandloop.
Try this activity before checking the code on my project repo. check out the mock-up below.
You will realize that as we move on, I expect that you are getting better at this as I will no longer openly post code solutions to activities here. I will only place mock-ups and then push the codes to the repo. Click here for access to the repository.
There you have it, You have Learned how to add Audio, Video, and a Favicon to your HTML Page.